Reaching Alignment: Joint Centration for Athletes
August 28, 2023
10 min. read
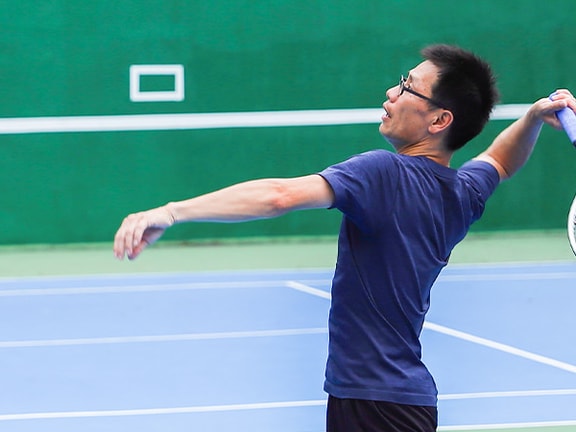
Overhead movements are essential in a variety of sports, including baseball, tennis, swimming, and many others. Although specific demands on the shoulder vary widely across these activities, optimal alignment between the humeral head and the glenoid fossa is a universal requirement. But how do we assess and train the specific ability to maintain this alignment? Addressing mobility deficits and muscle performance attributes such as activation, endurance, hypertrophy, and strength are necessary, but are they enough to ensure athletes can maintain precise glenohumeral joint alignment across the demands of their sport?
ICR, PICR, and Joint Centration
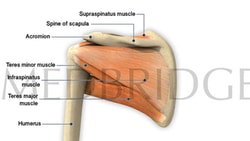
In both daily activities and athletics, optimal alignment of the humeral head in the glenoid fossa throughout an arc of motion is essential for a healthy shoulder. In normal mechanics, the center of rotation within the joint changes as the humerus moves. For this reason, it has been called the instantaneous center of rotation (ICR). Nordin and Frankel define the ICR as the point around which a rigid body rotates at a given instant of time.1
The path of the instantaneous center of rotation (PICR) can be helpful in assessing proper joint movement. Shirley Sahrmann writes, Although it is rarely referred to specifically, the observation of the PICR is the guideline that physical therapists use to judge whether the joint motion is normal or abnormal.2
Joint centration is the ability to maintain PICR throughout the arc of motion. Several factors influence joint centration, including muscles, ligaments, and the shapes of joint surfaces.2 Another key factor is the central nervous system. Proprioception provides feedback about the current joint position, while motor control allows us to adjust the position as needed. The interplay between these components during movement helps us achieve joint centration.
Assessment
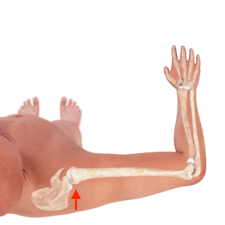
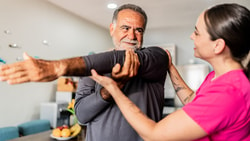
In the glenohumeral joint, centration is assessed in supine with the athletes shoulder at 90 degrees of abduction and a towel roll supporting the distal humerus to prevent lateral abduction. The athlete begins either at neutral or at maximal external rotation and then moves into internal rotation. During this motion, the humeral head should maintain its orientation in the glenoid fossa. Any anterior translation, or glide, of the humeral head would be considered a loss of centration. Both passive and active range of motion can be assessed, as well as any reproduction of symptoms.
Here is an example of the assessment.
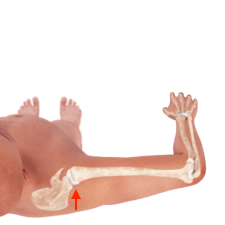
If anterior glide does occur, careful observation reveals if it is in the first half of the available range of motion or the second half. Why is this timing significant? During the first half of the movement, joint excursion is still relatively small, so the lengths of surrounding muscles and the joint capsule are unlikely to affect the joint motion. Thus, anterior glide in the first half of the motion is likely a motor control issue. During the second half of the motion, as the joint nears the end of the available range, anterior glide is more likely due to a mobility deficit. In the case of a mobility deficit, assessment of the end feel can distinguish a muscular restriction from a capsular one.
To summarize, if anterior translation occurs during:
First 50 percent of available range motor control issue
Second 50 percent of available range mobility deficit
[caption id="attachment_13521" align="alignnone" width="225"] Starting Position[/caption]

[caption id="attachment_13542" align="alignnone" width="225"] First 50 Percent[/caption]
[caption id="attachment_13541" align="alignnone" width="225"] Second 50 Percent[/caption]
This is demonstrated in the following video.
During the assessment, if symptoms are reproduced with the anterior glide as the athlete moves into internal rotation, a posterior glide can be applied to the humeral head in order to centrate the joint. If this alleviates symptoms, the anterior glide may be adversely affecting anterior structures of the glenohumeral joint and interventions to facilitate a posterior glide will likely decrease symptoms.
This concept is demonstrated in the following video.
Treatment
Prior to training joint centration, any mobility deficits interfering with internal rotation must first be addressed. For a muscular restriction, stretching has been shown to be effective. A study showed that a program of five different stretches for a population of throwers, including the sleeper stretch, significantly improved both internal rotation range of motion and the total arc of motion.3 The stretches were performed three to five times each for 30-second holds for 12 weeks.
Once the range of motion has been improved, the new range can be utilized through an exercise. One option for overhead athletes is band-resisted external rotation in standing. The athlete is cued to maintain glenohumeral joint centration throughout the movement, particularly during the eccentric portion from external rotation to internal rotation.
This combination of a passive stretch followed by an active exercise is demonstrated in the following video.
Posterior capsular restrictions in the glenohumeral joint have also been shown to increase humeral head anterior glide during shoulder internal rotation.4 In this case, anterior to posterior joint mobilizations can be applied to improve posterior capsule mobility. A study showed that a combined regimen of posterior mobilizations and stretching was effective at increasing glenohumeral joint internal rotation range of motion.5
Athletes can apply a posterior mobilization to their shoulder independently by placing a resistance band around the humeral head and anchoring it behind them. They move away from the anchor point to generate enough tension in the band to produce an adequate posterior glide and then reach behind their back to work on internal rotation.
As in the stretching example above, this posterior mobilization can be followed by an active exercise. In the same setup as the mobilization with a resistance band around the glenohumeral joint, the athlete holds a second resistance band, anchored in front of them, to practice joint centration during eccentric internal rotation.
This combination of interventions is demonstrated in the following video.
Athletes can use these three methods athletes to practice joint centration once mobility restrictions have been addressed. Athletes who do not present with mobility deficits can begin with these exercises.
Soda Can: In supine, with the shoulder abducted to 90 degrees and a towel placed under the distal humerus, cue the athlete to move into internal rotation. As a tactile cue, they can use the bottom of a soda can placed over the humeral head. As they sense anterior glide, they can apply pressure to their own humeral head through the soda can.
Resistance Band: The weight of the soda can provides significant feedback to help maintain proper joint centration. To increase the challenge for the athlete, use a resistance band instead. With less pressure applied to the humeral head, the difficulty of maintaining joint centration increases.
Wrap the resistance band around the humeral head and then place it behind the athlete along the scapulae; the athlete holds the ends of the band in their opposite hand. The athlete then rotates from external to internal rotation while focusing on maintaining joint centration.
This can be further progressed by reaching the contralateral upper extremity toward the ceiling and protracting the scapula against the resistance band. This will rotate the thorax slightly toward the ipsilateral upper extremity and activate scapulothoracic muscles.
Holding this position, the athlete can then practice joint centration as they internally rotate.
No Assistance: Once the athlete is able to maintain joint centration with the above cues, they can progress to practicing centration without the assistance of an external, posteriorly directed force. You can assist with setup, but the athlete will rely entirely on their own motor coordination to maintain centration as they move into internal rotation.
Once the athlete demonstrates proper joint centration in supine without assistance, add resistance to progress the training.
Traditionally, resistance is added by holding the band in the hand. However, the point of force application is then two joints away from the site of joint centration, creating a very challenging situation. Instead of the hand, place the band more proximally, wrapping it around the humerus to create a force vector into external rotation. The athlete can then practice joint centration as they internally rotate against resistance. As the athlete progresses, the band can gradually be placed more distally, moving to the proximal forearm and then finally to the hand.
In addition to using a resistance band, the athlete can also be challenged by changing their position. In sitting, tall kneeling, and standing, the athlete no longer has assistance from gravity in a posterior direction to centrate their glenohumeral joint. As in supine, they can use the fingers of their contralateral hand to monitor their humeral head and avoid anterior glide. Beginning with their shoulder abducted to 90 degrees and elbow flexed to 90 degrees, they can rotate from external to internal rotation.
Prone is an even more challenging position. The athlete must work against gravity to stabilize the scapula and prevent anterior glide. With the shoulder in 90 degrees of abduction and the forearm hanging over the edge of the table, place a towel under the distal humerus. Enough space should be left under the anterior aspect of the glenohumeral joint to allow for anterior glide; this will allow you to clearly see if joint centration is lost and the humeral head glides anteriorly.
The athlete begins in external rotation with the scapula adducted and the glenohumeral joint centrated. As they internally rotate, they can focus on maintaining joint centration. Resistance bands or weights can be added to further increase the demand.
The prone position is demonstrated in the following video.
As the athlete progresses, joint centration can be practiced in more challenging, sports-specific positions as well.
For a tennis athlete, joint centration can be practiced while holding a tennis racket. In supine, the shoulder can be abducted to 100 degrees and maximally externally rotated to simulate the position during a tennis serve. The athlete can then be cued to internally rotate while maintaining joint centration and holding a racket. The speed of the movement can gradually be increased to simulate a tennis serve more closely.
Another way to challenge joint centration is by using a laser. A binder clip can be used to fasten a laser pointer to a wristband. Place the wristband around the athletes humerus. As a target, place a vertical line or a piece of tape on a wall in front of the athlete. In a standing position, the athlete brings their shoulder into 90 degrees of abduction and 90 degrees of elbow flexion.
Beginning in external rotation with proper joint centration and the laser on the tape, the athlete then moves into internal rotation. During this movement, cue the athlete to maintain joint centration and to keep the laser moving inferiorly along the tape. The speed of the motion can be increased to increase the challenge.
Several compensations might occur during this exercise. The athlete might rotate their trunk or move laterally to compensate for a loss of joint centration. To prevent this, place a second laser on the athletes chest to provide a visual cue.
This exercise is demonstrated in the following video.
There is a wide variety of ways to apply the principles and exercises outlined above. As the athlete develops competence with joint centration in different positions, resistance can be added through bands and weights, sport-specific implements can be held in the hands, a laser and visual target can be used, and the speed of movement can be adjusted.
The ultimate goal is to gradually progress the athlete through a series of exercises that increasingly simulate the demands of their activity, culminating in a successful return to sport.
To learn more, Jared Vagys series of courses on the movement system offer a deeper exploration into relative stiffness as well as other related concepts.
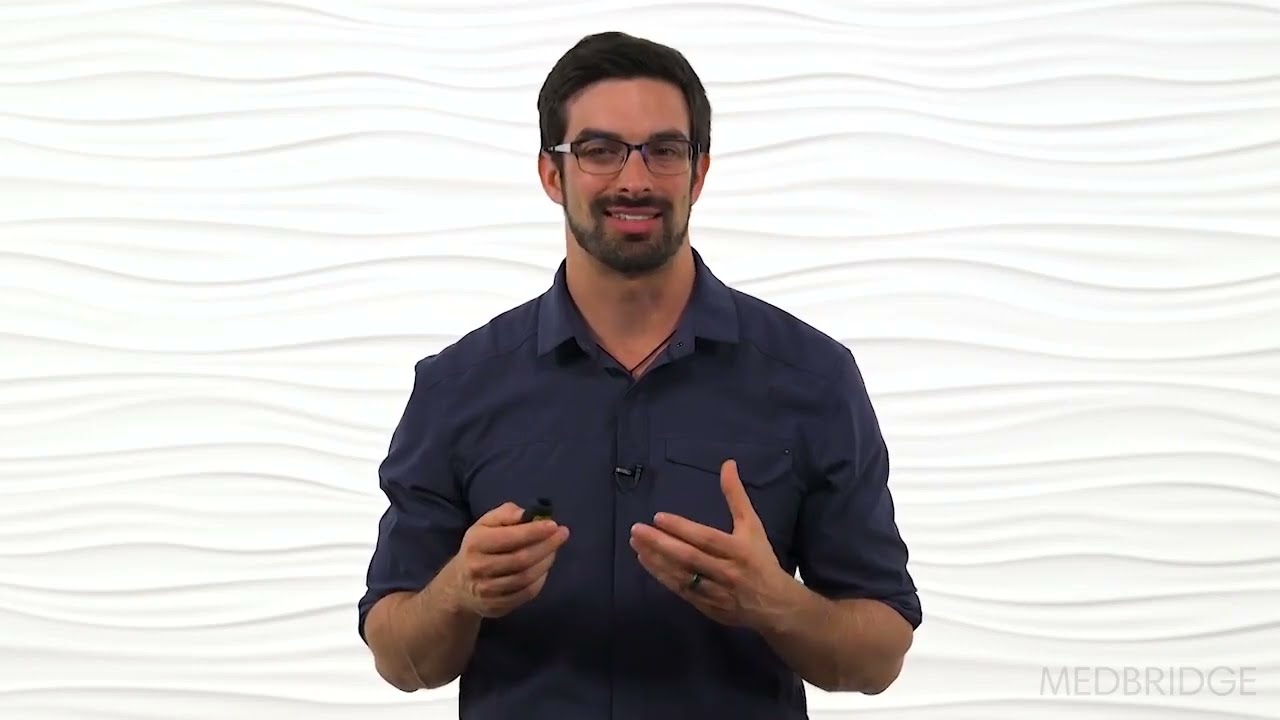
Below, watch Jared Vagy discuss the definition of joint centration in this brief clip from his MedBridge course, “The Movement System: Throwing Biomechanics and Treatment."
Meet the Authors


Subscribe to Our Newsletter
Related Posts
May 13, 2025
Shoulder Pain: When Posterior Restrictions Cause Anterior Symptoms
By Jared Vagy

December 1, 2021
Ditch the Treatment Table: How to Assess and Treat with Reference and Relative Motion
By Jared Vagy and Joseph Derian
March 30, 2016
Shoulder Biomechanics and Exercises
By Robert Donatelli

January 19, 2016
Why You Should Adopt an Athlete-Centered Model
By Susan Falsone